


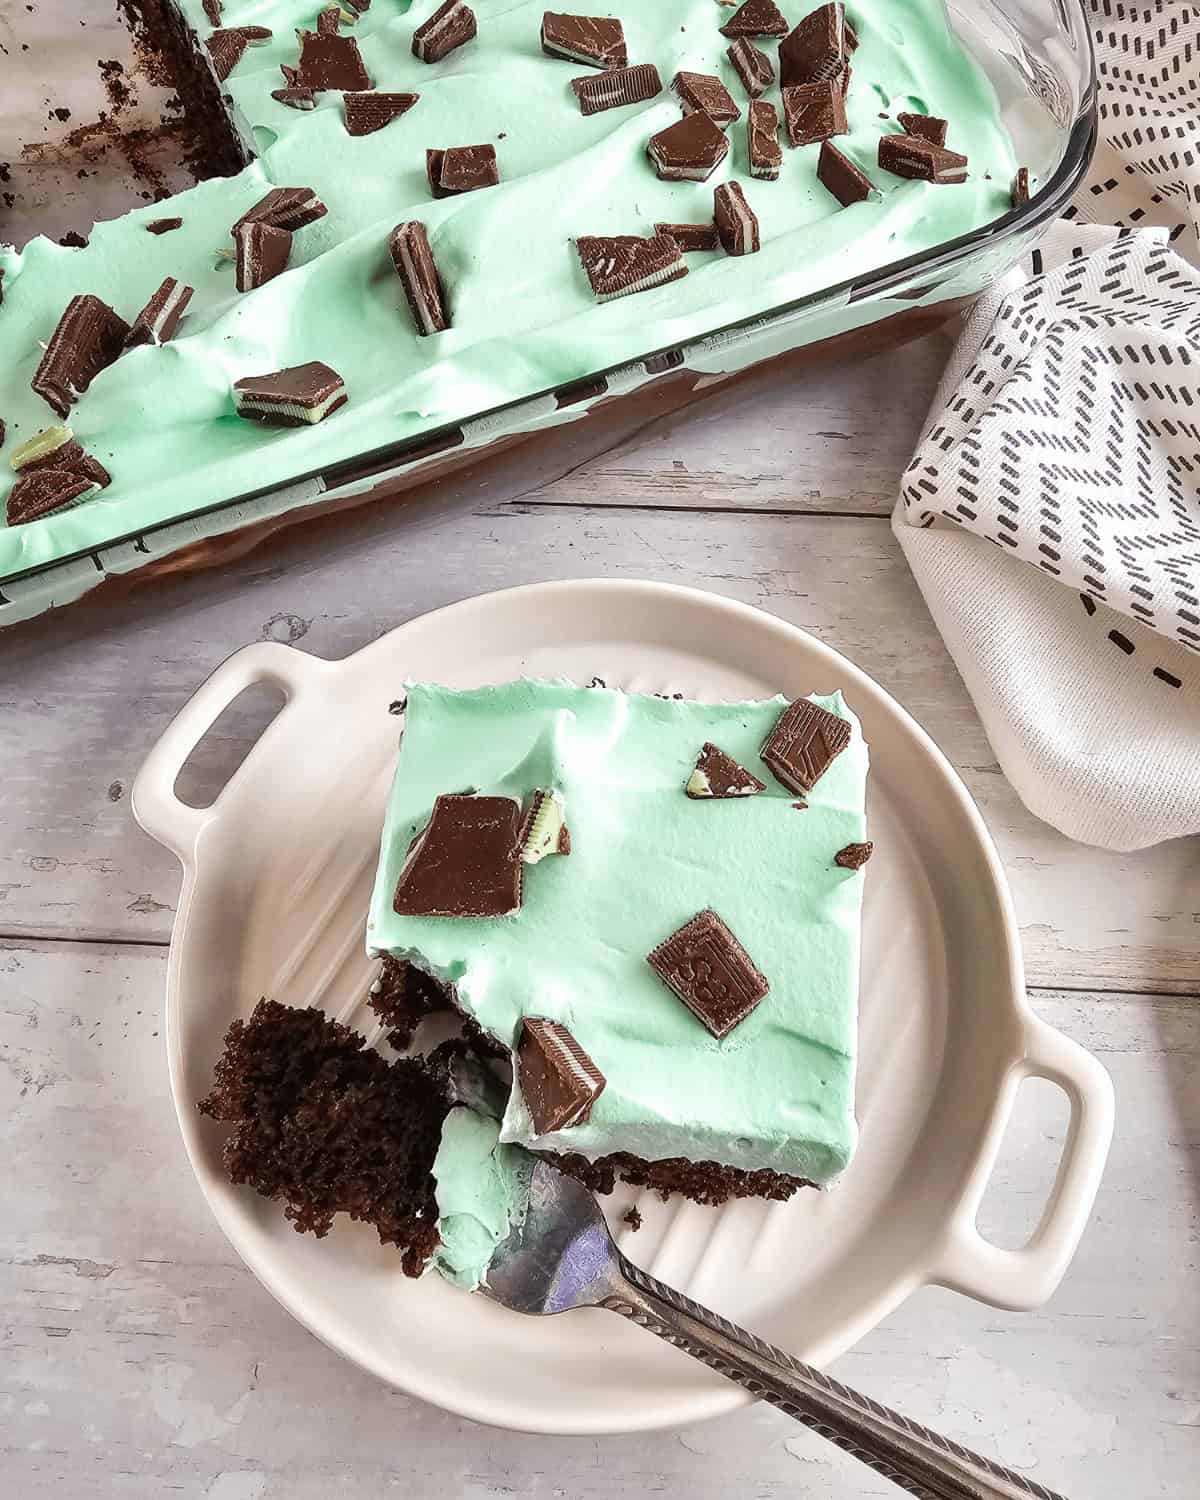
This Chocolate Mint Cake is a dream come true for people who love the refreshing flavor of Andes mints. It’s the perfect balance of sweet and cool, making it a delightful dessert for any occasion.
The combination of rich chocolate mint cake, creamy pudding, and refreshing whipped cream is simply irresistible.

SAVE THIS RECIPE!
Enter your email below and we’ll send this recipe straight to your inbox.
Why this Mint Chocolate Cake Recipe is a Keeper
The rich chocolate and vibrant green mint create a visually stunning cake that’s sure to impress. My son asked for a mint chocolate cake for his birthday cake. He really likes mint and this cake tastes like mint chocolate chip ice cream. It was such a hit my mom asked me to make the cake for her birthday.
- Easy: You use a box cake mix so this recipe is easy to make.
- Easy Ingredients: All easy to find pantry staples.
- Family Friendly: This cake is a favorite of all the members of my family.
- Adaptable: Can make three 8-inch cake pans for a layered chocolate cake.
If you’re looking for more mint recipes, try these Andes Chocolate Chip Mint Cookies, Mint Oreo Truffles and Mint Julep.
Can I make this recipe a layer cake?

Absolutely! You can definitely transform a poke cake into a stunning layer cake with a little creativity and adjustment. Here’s what you need to consider:
1. Baking the Layers:
- Double the recipe: Since poke cakes are typically baked in a single pan, you’ll need to double the recipe to create two separate cake layers.
- Adjusting baking time: Due to the smaller size and thickness of each layer, you might need to slightly reduce the baking time compared to the original recipe.
2. Poke and Fill:
- Poke each layer: After cooling the cake layers, poke holes individually using a fork or the end of a wooden spoon. This creates pockets for the filling to soak into and distribute flavor evenly.
3. Assembly and Frosting:
- Level the layers if needed: Use a cake leveler or a serrated knife to ensure the layers are even for a smooth presentation.
- Frosting the cake: Here’s where your creativity can shine! You can frost the entire cake, including the sides, or just the top, depending on your preference. Opt for a classic buttercream, a whipped cream frosting, or a flavored frosting that complements your filling.
Mint Chocolate Cake Ingredient Notes

- Chocolate cake mix: This has all the dry ingredients you need including baking powder and baking soda. Just add the wet ingredients per the package directions.
- Whipped Cream: You want a tub of cool whip.
- Peppermint extract: This adds that cool peppermint flavor to the cake.
See the recipe card below for a complete list of the ingredients with measurements.
Variations and Substitutions for Chocolate Mint Cake
You can make this cake in so many different combinations. Vegan chocolate or in 9-inch round cake etc.
- Mint extract: You can use mint flavor in place of the peppermint
- Buttercream frosting: Finish with a mint buttercream or a tempting drizzle of chocolate ganache on top of the mint frosting.
- Cake: Milk chocolate or dark chocolate cake.
Special Equipment Needed to Make Mint Sheet Cake with Chocolate
- Wooden Spoon: This handle of a wooden spoon works great or you can use a straw to create the holes for the chocolate mint cake.
Fun Fact / Pro Tip
Poke 30-40 Holes about 1 inch apart. It is perfect for a 9×13 cake.
How to Make Chocolate Poke Cake Recipe
You can make this chocolate cake with a buttercream recipe or with chopped dark chocolate. It is a wonderful recipe.
These are the basic steps for making chocolate poke cake. Refer to the full, printable recipe card below for detailed instructions.
1. Prepare the Ingredients, preheat the Oven and Spray Pan
First, preheat the oven to 350 degrees, and grease a 9×13 inch cake pan.
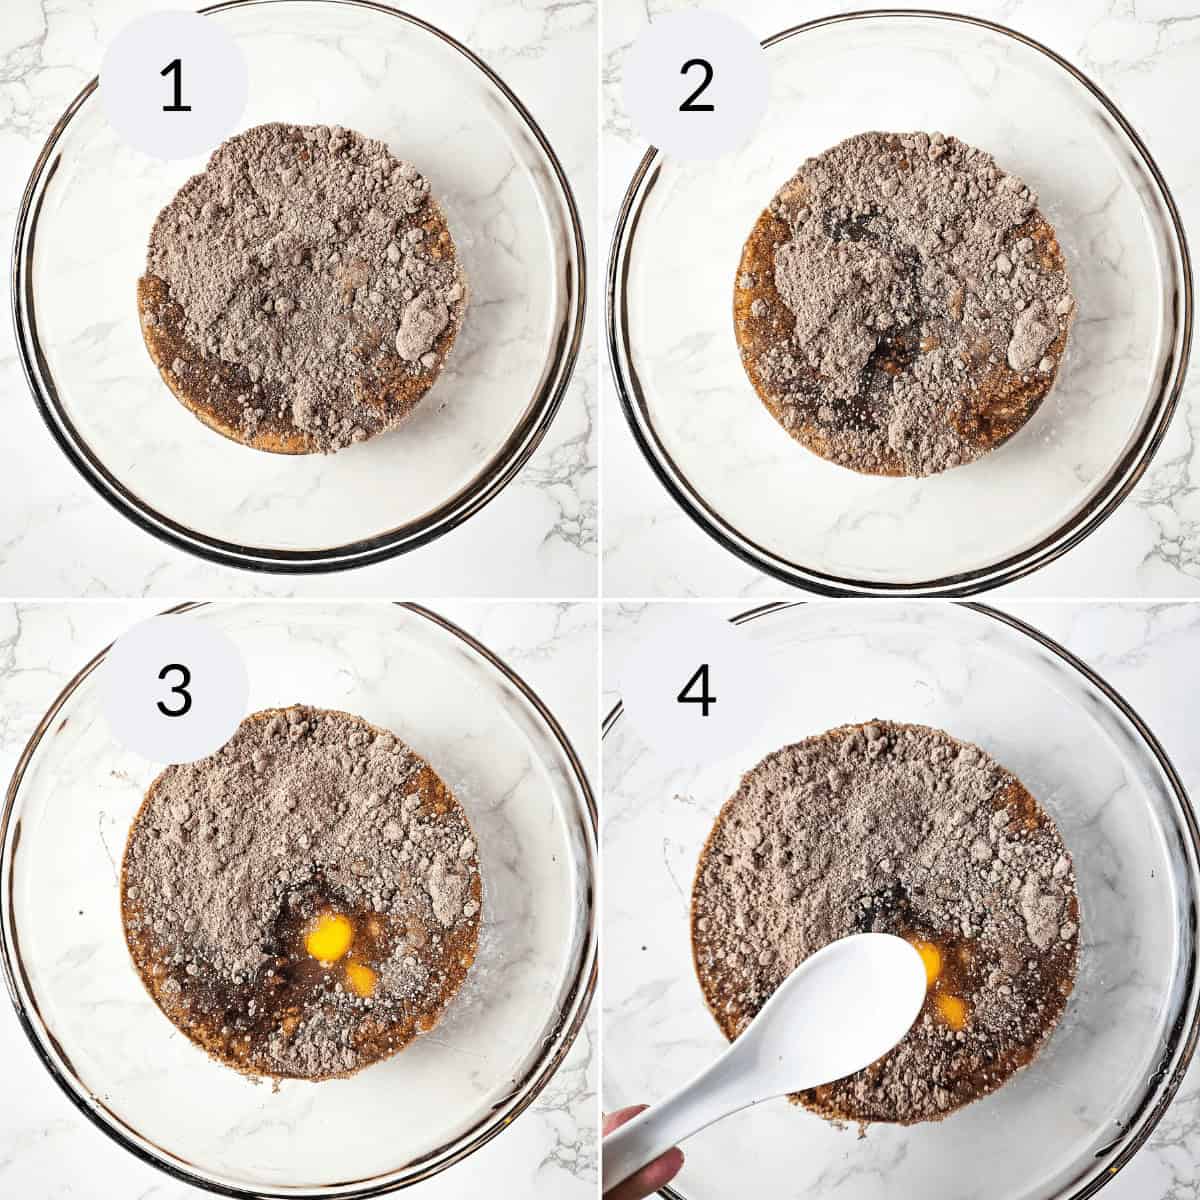
2. Make the Cake Batter
Then add the cake mix, water, oil, eggs, and peppermint extract to a large mixing bowl and using an electric mixer, beat on medium speed for 2 minutes. Next, fold in ¾ cup of chopped Andes mint pieces, and pour into the prepared Cake pan.
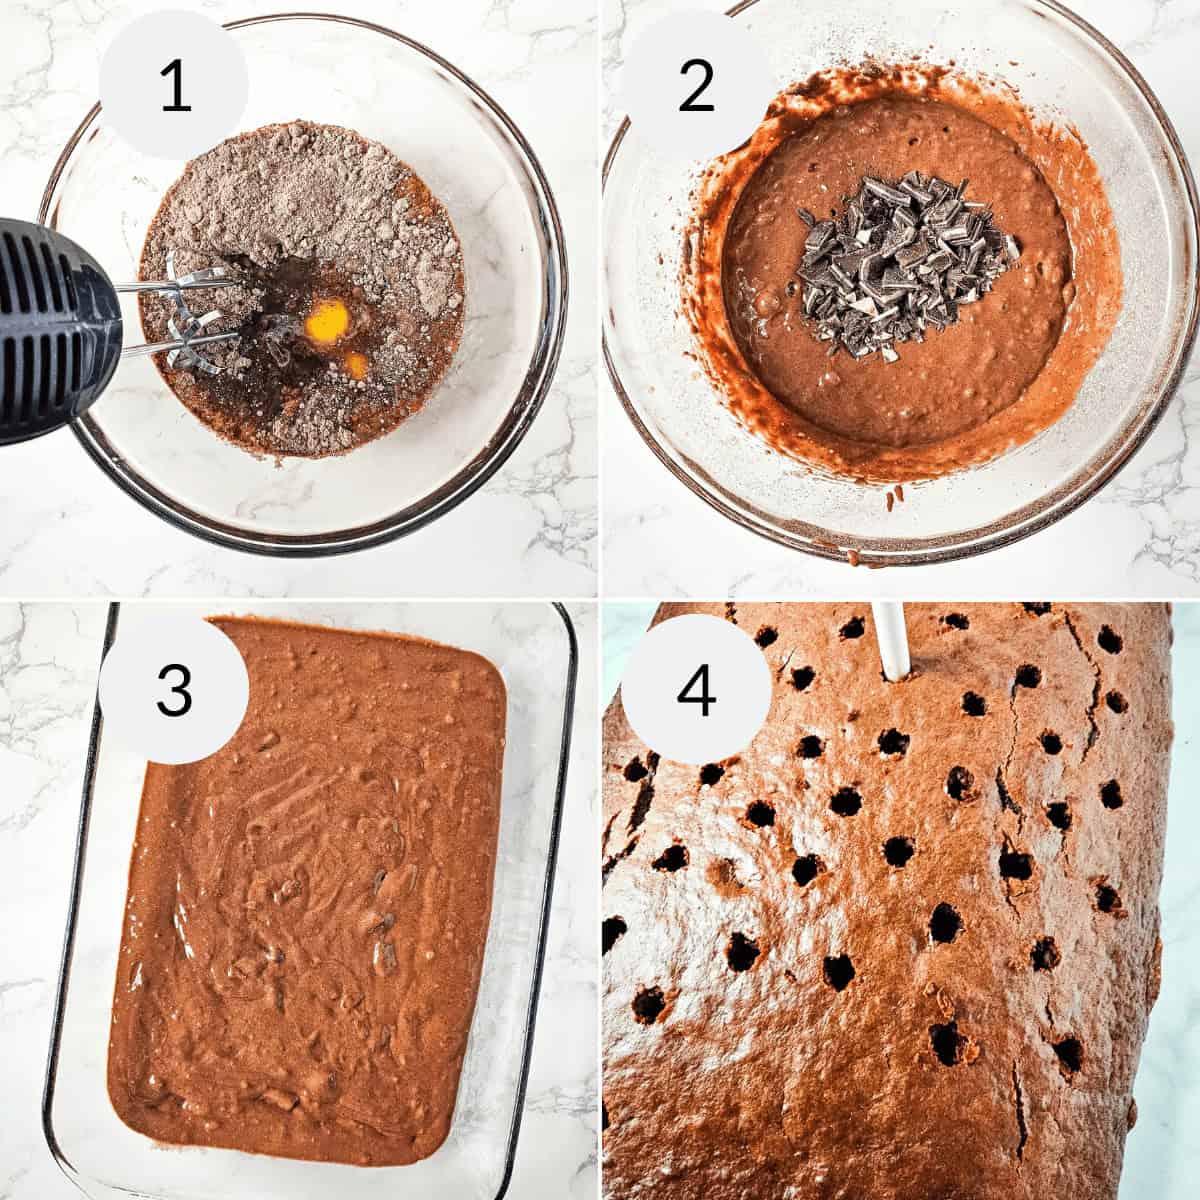
3. Bake the Cake
Bake for 28-33 minutes, or until a toothpick inserted into the center of the cake comes out clean. Remove the cake from the oven, and allow it to cool for 1 hour.
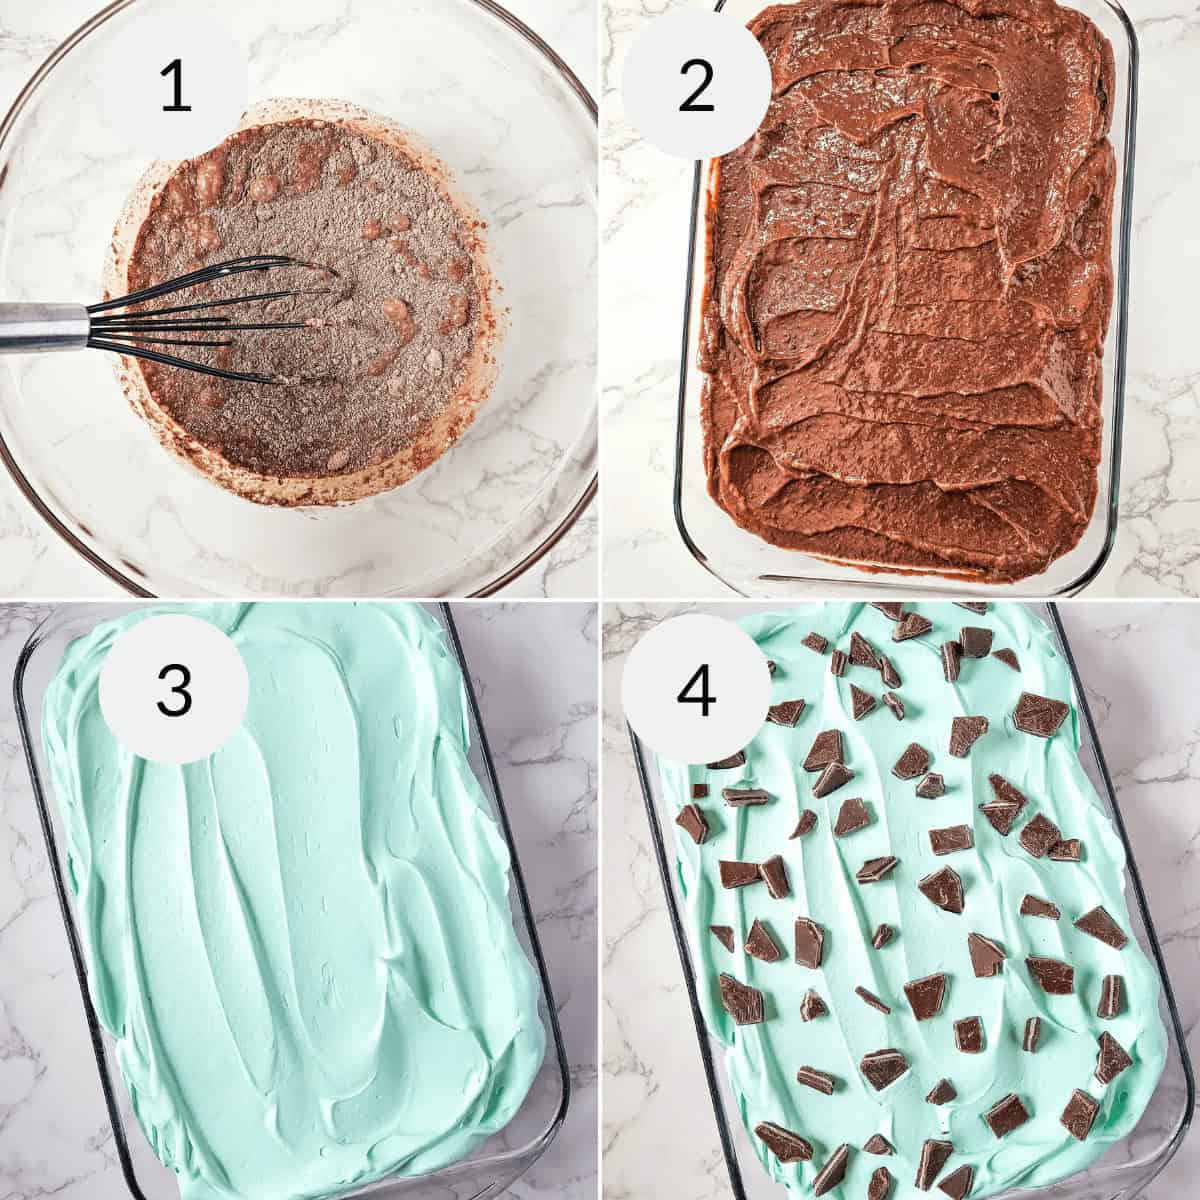
4. Prepare the Filling
Using the handle of a wooden spoon, poke holes into the cake, about 1 inch apart. Add pudding mix and milk to a bowl and beat with a whisk for 2 minutes. Pour over the cake, and spread across the entire cake, it will seep into the holes, and leave a pudding layer on top as well.
5. Frosting for the Top of the Cooled Cake
Add green food coloring to the tub of whipped topping and stir until a solid color forms. Spread over cake. Place the cake in the refrigerator for 2 hours to allow it to completely set.
Recipe FAQs
Expert Tips for Making This Mint Chocolate Chip Cake Recipe
- Top: Sprinkle a little cocoa powder on top or some chocolate chips to finish the mint cake. White chocolate chips add a nice contrast.
- Garnish with Mint: Decorate the top of the cake with some fresh mint leaves.
- Chocolate Bar: Use a vegetable peeler and make chocolate shavings for this great recipe.
- Gel Food Coloring: For a more vibrant color, use green gel food coloring.
- Mint: Feel free to add just a hint of mint extract or if you love mint, add more to the chocolate mint cake.
- Serve: You can serve with mint chocolate chip ice cream or crumble some thin mint cookies on top. For St. Patrick’s day decorate with your favorite decorations.
What to Serve with Chocolate Poke Cake Recipes
- Cocoa Condensed Milk Ice Cream (No Churn)
- 20 Easy Ice Coffee Recipes
- Copycat Shamrock Shake Recipe
SAVE THIS RECIPE!
Enter your email below and we’ll send this recipe straight to your inbox.

Chocolate Mint Cake
Equipment
- x13-inch baking dish
- Medium mixing bowl
- Hand mixer or stand mixer
- Wooden spoon handle
SAVE THIS RECIPE!
Ingredients
- 1 13.25 ounce box Chocolate fudge cake mix
- 1 cup Water
- ½ cup Vegetable oil
- 3 Large eggs
- ¼ teaspoon Peppermint extract
- 1½ cups Andes Crème de Menthe baking chips or Andes Mints, chopped, divided
- 1 3.4 ounce box Instant chocolate pudding mix
- 1¾ cups Cold whole milk
- 1 8 ounce container Frozen whipped topping, thawed
- 5 drops Green food coloring, optional
Instructions
- Preheat the oven to 350°F. Lightly grease a 9×13-inch baking dish.
- In a large mixing bowl, combine the cake mix, water, vegetable oil, eggs, and peppermint extract. Beat with a hand mixer on medium speed for 2 minutes. Fold in ¾ cup of the chopped Andes Mints. Pour the batter into the prepared baking dish.
- Bake for 28 to 33 minutes, or until a toothpick inserted into the center comes out clean. Let the cake cool completely, about 1 hour.
- Using the handle of a wooden spoon, poke holes evenly across the top of the cooled cake, spacing them about 1 inch apart.
- In a medium mixing bowl, whisk together the instant chocolate pudding mix and cold milk for about 2 minutes, or until slightly thickened.
- Pour the pudding evenly over the cake, using a spoon or offset spatula to help guide it into the holes and spread the remaining pudding into an even layer.
- Stir the green food coloring into the thawed whipped topping, if using, until evenly colored. Spread the whipped topping evenly over the pudding layer.
- Sprinkle the remaining ¾ cup chopped Andes Mints over the top.
- Refrigerate for at least 2 hours, or until fully chilled before slicing and serving.
Christina’s Notes
Let the cake cool completely before adding the pudding so the filling sets properly instead of becoming runny.
Whisk the pudding just until it begins to thicken, then pour it over the cake while it is still easily spreadable.
Green gel food coloring creates a brighter mint color than liquid food coloring, but either works well.
Garnish with chocolate curls, mini chocolate chips, or fresh mint leaves for an extra-special presentation.
Serve with mint chocolate chip ice cream for an easy dessert pairing.
This cake can be made 1 day in advance and refrigerated until ready to serve.
Store leftovers covered in the refrigerator for up to 4 days.
Freeze individual slices, tightly wrapped, for up to 2 months. Thaw overnight in the refrigerator before serving.
- Scale the recipe: Simply adjust the serving size in the recipe card and the ingredients will update automatically.
- Make your own All Purpose Seasoning: When a recipe calls for All Purpose Seasoning, you can use my homemade All Purpose Seasoning recipe or substitute salt and pepper to taste.
- Meat doneness: I always use a meat thermometer to test for doneness when cooking meat.
- Use unsalted butter: I use unsalted butter so I can control the salt level in the recipe.
- Preheat the oven: Unless otherwise noted, always preheat your oven before baking.
For more helpful information about this recipe, such as variations, substitutions and other pro-tips, check out the blog post.