


Venison Chili turns a freezer full of ground deer meat into dinner in under an hour. Pantry staples do most of the work. Venison runs leaner than beef, so this recipe leans on chipotle, brown sugar and chili seasoning to build flavor and depth.
Some other great chili recipes to try include Leftover Brisket Chili and Three Bean Chili.

SAVE THIS RECIPE!
Enter your email below and we’ll send this recipe straight to your inbox.
Why this Recipe is a Keeper
This is what I make during hunting season when the freezer is full. Here is why it works.
- Fifty Minutes Start to Finish: Ten minutes of prep and forty on the stove gets you a full pot.
- Pantry Ingredients: Beyond the venison, everything else is canned goods and spices you already have.
- Adaptable: Skip the beans, swap the variety, or add vegetables. It holds up to changes.
- Feeds Eight: One pot handles a family dinner with leftovers, and it doubles easily.
What Is the Difference Between Ground Beef and Ground Venison?

Ground beef carries more calories, fat and saturated fat than ground venison does. Venison tastes richer with a distinctly gamey note. Beef is juicier and much milder by comparison. That leanness is why venison needs help.
Without added fat or bold spices it can turn dry and flat. Chili is a good match because the long simmer and heavy seasoning both work in venison’s favor.
Pro Tip
A squeeze of fresh lime or orange juice at the end brightens the whole pot.
Acid cuts through the earthiness of the venison. A splash of Worcestershire does something similar.
Ingredient Notes
A few of these are worth understanding before you start.
This is an overview of key ingredients. Get the full printable recipe with specific measurements and directions in the recipe card below.
- Ground Venison: This makes a lean, healthy chili. Ground turkey works if you have no venison on hand.
- Chipotle in Adobo: Two teaspoons brings smoke and heat that stands up to the gamey flavor.
- Brown Sugar: It balances the acidity of the tomatoes and rounds out the chipotle heat.
- All-Purpose Flour: Two tablespoons thicken the chili as it simmers so it does not stay soupy.
- Canned Beans: Kidney and black beans are what I use, but any variety you like works here.
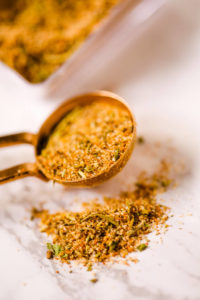
- All Purpose Seasoning: Two teaspoons of my All Purpose Seasoning Blend handles the base seasoning.
Variations and Substitutions
This chili made with venison is easy to customize. Try one of these.
➡️ Change the Beans: Pinto, cannellini, or black beans all work in place of kidney beans.
➡️ Add Vegetables: Carrots, celery, corn, or zucchini all disappear into the pot and add bulk.
➡️ Make It Creamy: Stir in sour cream, cream cheese, or shredded cheese at the end of cooking.
➡️ Add Fatty Pork: Cooked bacon or browned chorizo compensates for how lean venison is.
➡️ Blend the Meats: Use half ground venison and half ground beef for a milder result.
Special Equipment Needed To Make It Easier
A heavy pot is the main thing. The rest is standard kitchen gear.
- Dutch Oven: The heavy base keeps the chili from scorching during the long simmer.
- Wooden Spoon: You need something sturdy to break up the meat as it browns.
- Measuring Cups: Useful for portioning the beans and tomatoes if you are scaling the recipe.
- Measuring Spoons: The chipotle, seasoning and chili mix are all measured by the spoon.
How to Make Chili Made with Venison
Here is the short version. Full detail is in the recipe card below.
These are just highlights. Get the full printable recipe with specific measurements and directions in the recipe card below.
- Brown the venison with the onion, bell pepper, garlic, and All Purpose Seasoning.
- Drain off any excess fat from the pot.
- Stir in the chili seasoning, brown sugar, chipotle, and flour, then cook briefly.
- Add the crushed tomatoes and both cans of beans.
- Simmer covered for 30 minutes, then serve with your favorite toppings.
Prep Ahead and Short Cut Tips
Chili is one of the best make-ahead meals there is.
➡️ Cook It Two Days Early: The flavor genuinely improves overnight as everything melds together.
➡️ Dice Vegetables Ahead: Chop the onion, pepper, and garlic the day before and refrigerate them.
➡️ Brown Meat in Advance: Cook and drain the venison ahead, then finish the chili when you need it.
➡️ Double the Batch: Make two pots worth and freeze half for a future weeknight.
➡️ Portion for Lunches: Divide leftovers into single-serving containers before refrigerating.
Alternate Cooking Methods
The stovetop is easiest, but this chili works other ways too..
- Use a Slow Cooker: Brown the venison first, then transfer everything and cook on low for several hours.
- Try the Instant Pot: Use the saute function to brown, then pressure cook and adjust the liquid down.
- Simmer Longer: An hour or more on low heat deepens the flavor well past the thirty minute mark.
How Do I Get Rid of the Gamey Flavor in Venison?
Spices do most of the work. Chili powder, cumin, and oregano all cover the gamey note effectively. A spoonful of cocoa powder is the trick that surprises people. It adds depth without tasting like chocolate.
Tomato paste works similarly, bringing concentrated savory flavor that balances the venison. Acid helps too. Lime juice, orange juice or a splash of vinegar all brighten and balance the pot.

How to Store, Reheat, and Use Leftovers
- Storing: Keep leftovers in an airtight container in the refrigerator for up to four days. Freeze cooled chili for up to three months.
- Reheating: Warm it gently on the stovetop over medium-low heat until heated through. Thaw frozen chili overnight in the fridge first.
- Using Leftovers: Spoon it over baked potatoes or corn chips for nachos. It also works as a filling for tacos, or serve it alongside English muffin toast bread.
Expert Tips for Making This Recipe
These are the things that make this chili better every time.
➡️ Add Citrus at the End: Squeeze in lime or orange juice right before serving, never during the simmer.
➡️ Do Not Skimp on Spice: Go heavier than you would with beef, since venison can absorb a lot.
➡️ Add Bacon Fat: Render a couple slices of bacon first and brown the venison in that fat.
➡️ Simmer Longer When I Can: Give it a full hour when time allows, since the flavor keeps improving.
➡️ Make It the Day Before: Cook this a day ahead whenever serving guests.
➡️ Improvements: Add 1 teaspoon cocoa powder, the classic trick for game meat; adds depth without tasting like chocolate. Add fire‑roasted tomatoes instead of crushed for smoky complexity.
➡️Finish with a splash of apple cider vinegar: It brightens the richness at the end.
We Recommend You Try These



SAVE THIS RECIPE!
Enter your email below and we’ll send this recipe straight to your inbox.

Best Venison Chili Recipe for Hunting Season
Equipment
- Dutch oven or large soup pot
SAVE THIS RECIPE!
Ingredients
- 1½ pounds Ground venison
- 1 Yellow onion, diced
- 1 Green bell pepper, diced
- 4 Garlic cloves, minced
- 2 teaspoons All Purpose Seasoning
- 3 tablespoons Chili seasoning mix
- 2 tablespoons Light brown sugar, packed
- 2 teaspoons Minced chipotle pepper in adobo sauce
- 2 tablespoons All-purpose flour
- 29 ounces Crushed tomatoes, 1 can
- 15.5 ounces Kidney beans, 1 can drained and rinsed
- 15.5 ounces Black beans, drained and rinsed
Instructions
- Heat a Dutch oven over medium-high heat. Add the ground venison, onion, green bell pepper, garlic, and All Purpose Seasoning. Cook, breaking up the meat with a wooden spoon, for 8 to 10 minutes, or until the venison is browned and the vegetables are softened.
- Drain any excess fat, if necessary.
- Stir in the chili seasoning mix, brown sugar, minced chipotle pepper in adobo sauce, and flour. Cook for 1 to 2 minutes, stirring constantly, until the spices are fragrant.
- Add the crushed tomatoes, kidney beans, and black beans. Stir until well combined.
- Bring the chili to a gentle simmer. Reduce the heat to medium-low, cover, and cook for 30 minutes, stirring occasionally, to allow the flavors to develop.
- Taste and adjust the seasoning if needed. Serve warm with your favorite chili toppings.
Christina’s Notes
- Drain the Fat: Even lean venison releases some fat, and draining keeps the chili from turning greasy.
- Bloom the Spices: Cooking the seasoning with the meat for a minute makes the flavor noticeably deeper.
- Simmer Covered: Keeping the lid on holds the liquid in so the chili does not reduce too far.
- Better the Next Day: Make it ahead when you can, since the flavor improves overnight.
- Store Properly: Refrigerate up to four days or freeze up to three months.
- Scale the recipe: Simply adjust the serving size in the recipe card and the ingredients will update automatically.
- Make your own All Purpose Seasoning: When a recipe calls for All Purpose Seasoning, you can use my homemade All Purpose Seasoning recipe or substitute salt and pepper to taste.
- Meat doneness: I always use a meat thermometer to test for doneness when cooking meat.
- Use unsalted butter: I use unsalted butter so I can control the salt level in the recipe.
- Preheat the oven: Unless otherwise noted, always preheat your oven before baking.
For more helpful information about this recipe, such as variations, substitutions and other pro-tips, check out the blog post.